Hey Guys! It’s Monday. I know, sometimes Monday’s are the worst, but I’m hoping that this post will bring a cool vibe to the beginning of yer weeks. Today I’ve got a really awesome DIY to share with you and a super sweet BLACK+DECKER AutoSense cordless drill giveaway!
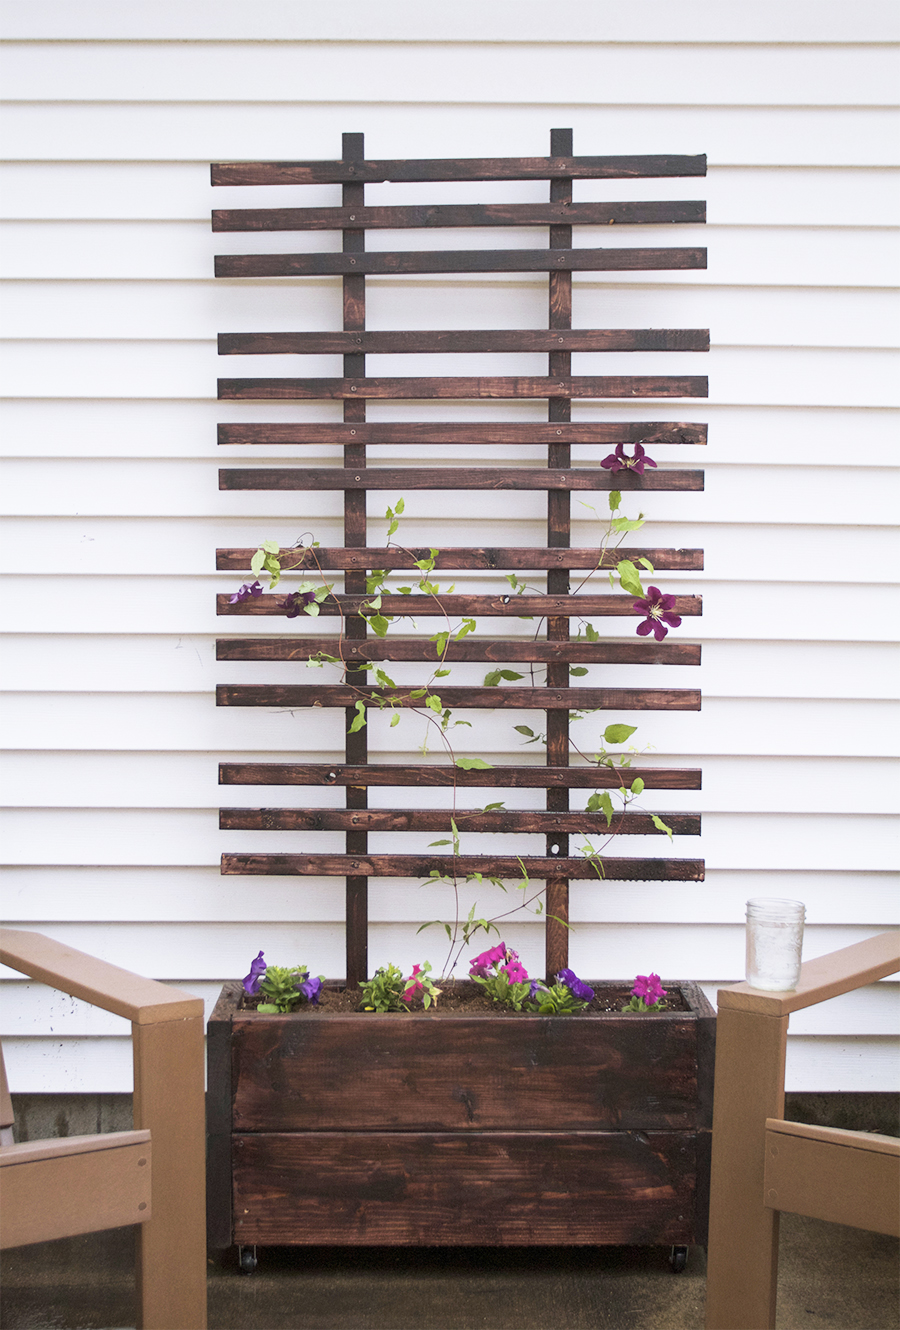
I spent the afternoon yesterday building a trellis-planter-box combo for our backyard. Some of you know that I’ve been trying to pretty up the concrete pad that we recently enclosed when we installed our new fence. The kids play back there all the time – which is fantastic – but the space needs a little softening up. I thought a planter box with trellis would be a good solution as it would help add height and greenery without taking up valuable play space. It’s also on casters so it can be moved easily if needed. Word up to thinking ahead!

|
Supply List (Supplies for Trellis & Planter Box) 5 – 2″ x 8″ x 32″ Douglas Fir Boards 4 – 2″ x 8″ x 10.25″ Douglas Fir Boards 14 – 1″ x 2″ x 32′ Strips 2 – 1″ x 2″ x 64″ Strips 4 -2″ x 2″ x 12″ Strip 1 Box 1-1/4″ Screws 1 Box 2-1/4″ Screws A set of 4 Rubber Casters BLACK+DECKER AutoSense Lithium Drill Drill Bits Stain |
|
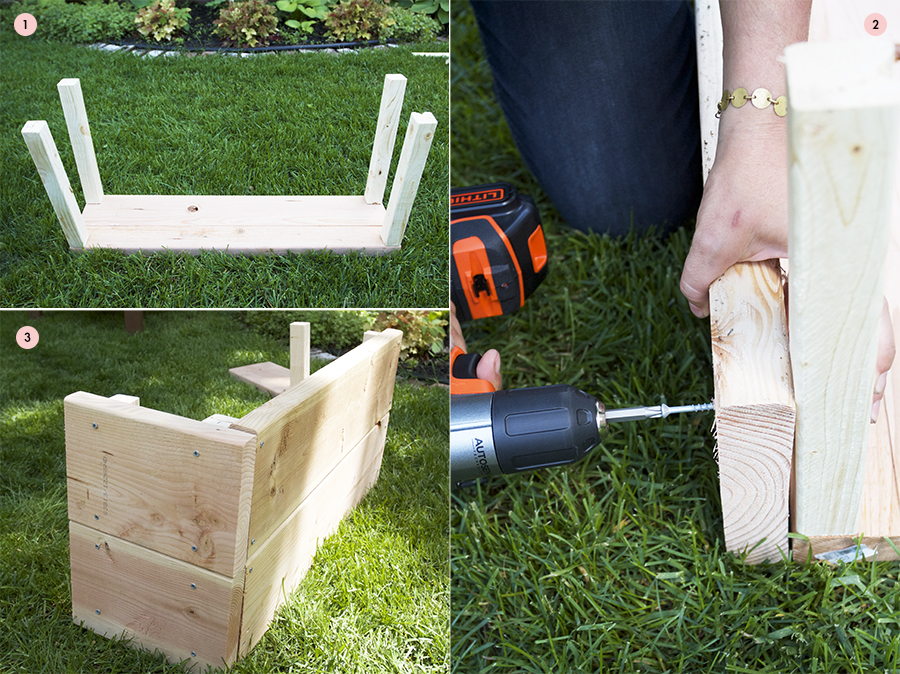
1 Attach four 2 x 2 x 12″ posts to one 2 x 8 x 32″ board Attach the four 12″ post to each of the corners. Drill pilot holes through the bottom of the long board and into the posts, then attach with a 2-1/4″ screw. 2 Attach boards to create a box Begin to attach the boards, start by drilling pilot holes through the board into the post behind it, then attach with a 2-1/4″ screw. 3 Continue to attach boards Use the remainder of your 2 x 8 x 32″ boards and your 2 x 8 x 10.25″ boards, attaching the shorter borders on the side and the longer boards to the front and back. |

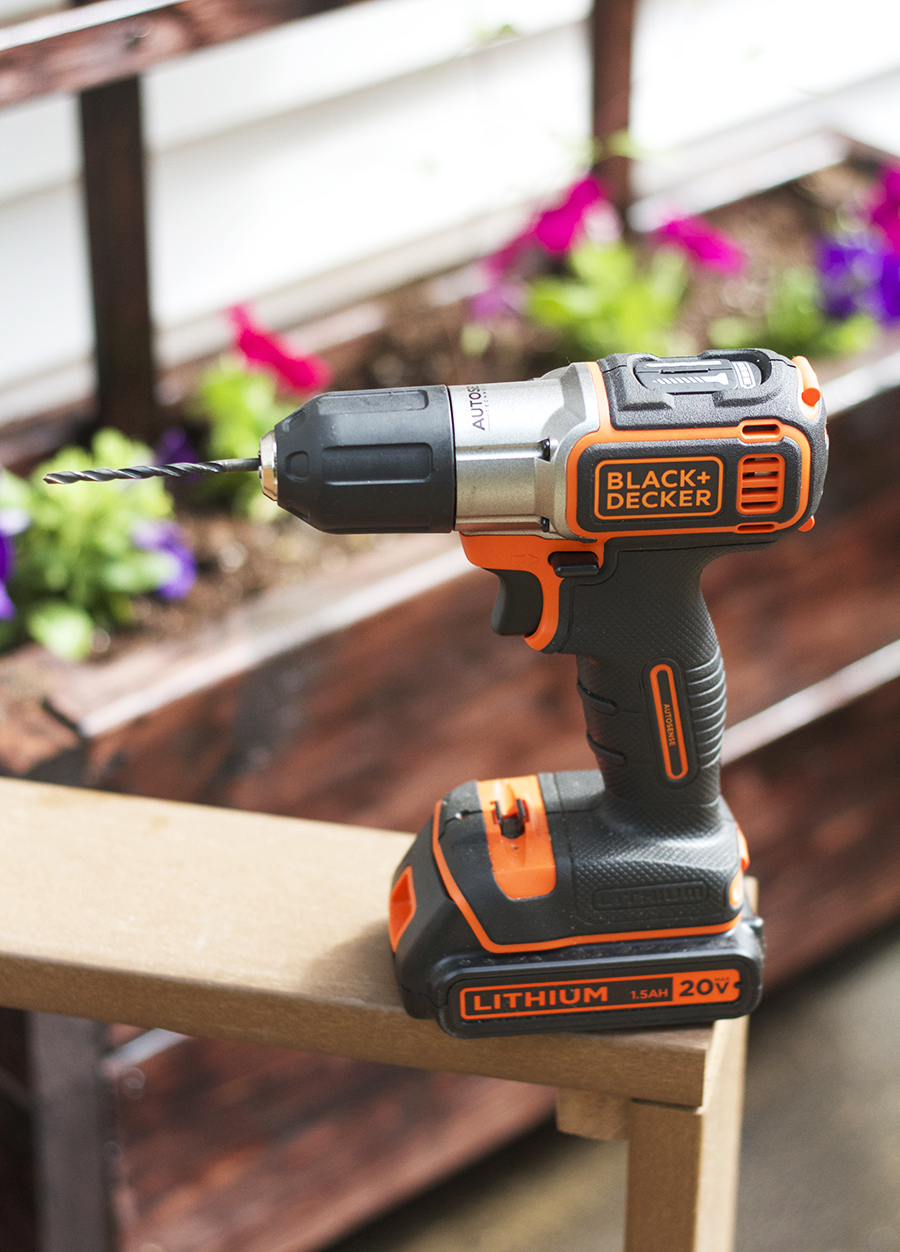
This BLACK+DECKER Lithium Drill made the job really easy because you don’t have to set anything! This project requires a lot of drill bit-changing – which would normally be a pain in the butt – but the Lithium Cordless Drill with AutoSense makes it easier. It has two modes, drill and drive. In drive mode, a microprocessor continuously measures the tool’s performance. As the screw enters the material there is a rapid change in its torque profile. The microprocessor analyzes the rate of change and stops most screws flush with the material within three milliseconds. Basically you don’t have to constantly switch from drill mode to setting the torque, all you have to do is push a button.
I’ve stripped a lot of screws in my day trying to figure out the right torque to use for a specific project, this drill takes the worry out of all that business.

See how fast that was? This planter box is built, on to the trellis!


Jamz: “Dream Team” from Lazerbeak – used with permission.
For the trellis you will be using your two 1 x 2 x 64″ pieces of lumber as well as your twelve 1 x 2 x 32″ pieces. It would be smart to consider using a jig for your spacing. I used a leftover piece of 2 x 2 for the smaller spacing and a piece of lumber cut to a width of 3.75″ for the larger space. You can see in the above video how I attached the pieces of wood and how easy it was to do with the BLACK+DECKER drill.
It should be noted that I spaced by longer wood pieces 8.5″ inside of the 32″ pieces. I also started the pattern 2″ from the top of the trellis. The pattern consisted of 4 groups of boards (2 groups of 3 and 2 groups of 4) all spaced with with the 3.75″ jig. Each individual group of boards was then spaced using the 2 x 2″ jig.
You can be creative here and don’t have to follow my pattern to a T. Do you!
|
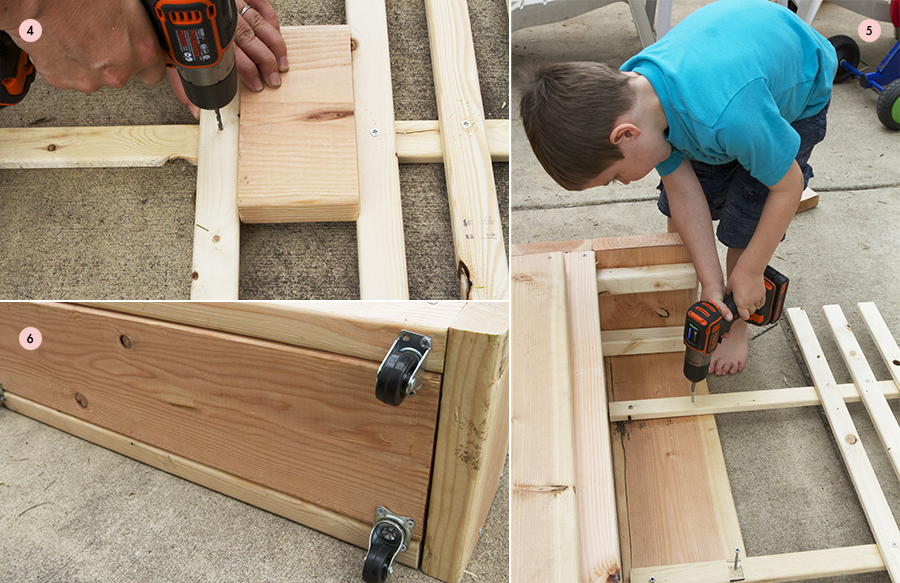
4 Using a Jig to space the trellis Here’s an example of how my jig worked. It helped to evenly and consistently space the trellis boards without having to measure every time. 5 Attach the Trellis to the inside of the planter box Attach the trellis 8″ into the planter box using 4 screws to increase the stability. It was easy to do this with the trellis tipped on the side. We also removed one of the front pieces of lumber from our planter box while we attached the trellis. This drill is so light weight and easy to use, Finn was able to use the BLACK+DECKER cordless drill like a bawse. 6 Attach Casters to the bottom of the Planter Box I would highly recommend adding some casters to the bottom of your planter box, although it’s not required. The casters will allow you to easily move your new and very heavy planter box. Also, if you wanna be a real good gardener make sure to add some drainage holes to the bottom of the planter box. |

I wanted our box to contrast the white siding of our garage so Finn and I went to town and stained it using Minwax Gel stain in Brazillian Redwood. We didn’t use the highest quality lumber for this job, and I figured a good staining would make it look a bit more fancy. This was my first time staining anything! It’s practice for the fence-staining project coming later this summer ;)
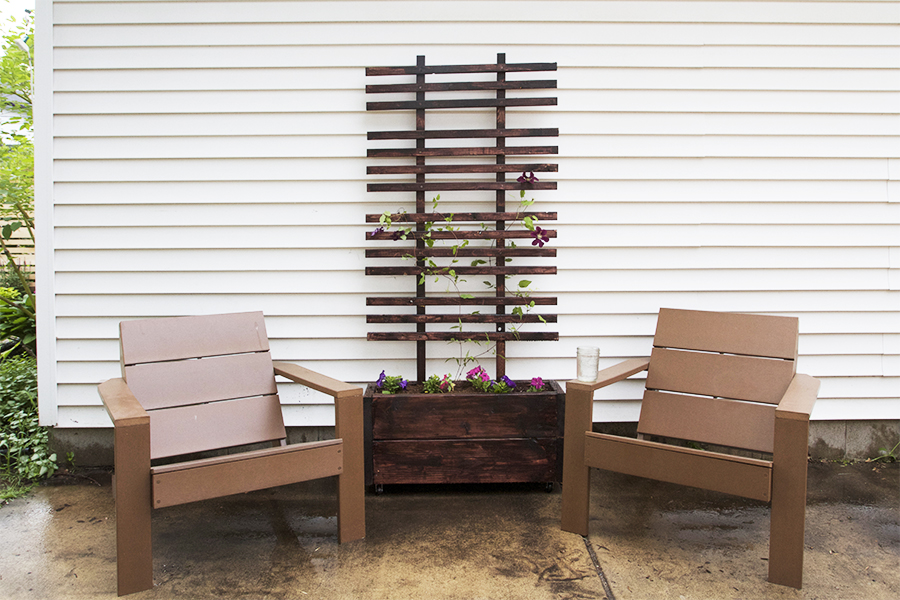
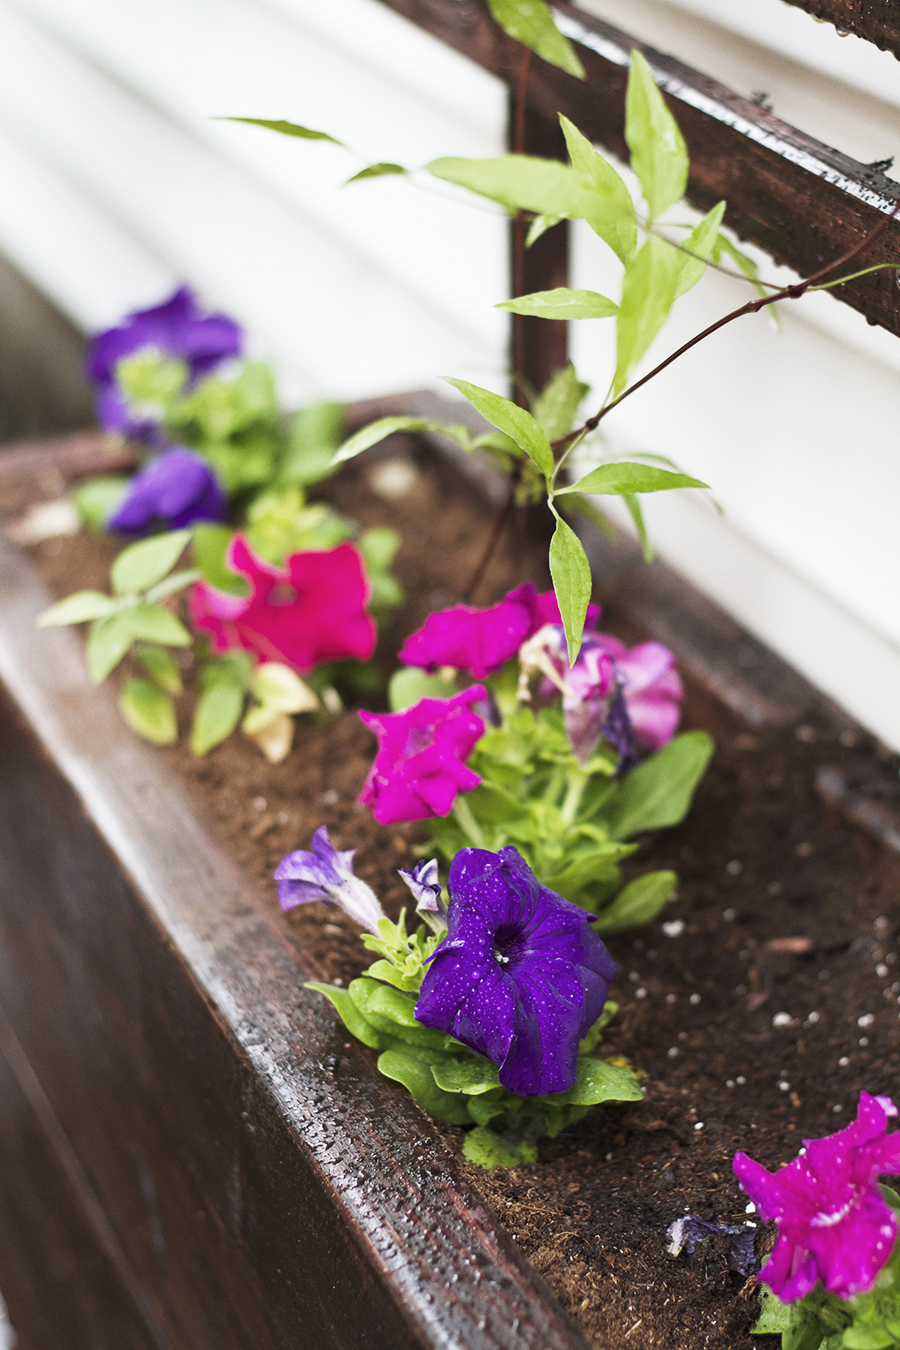
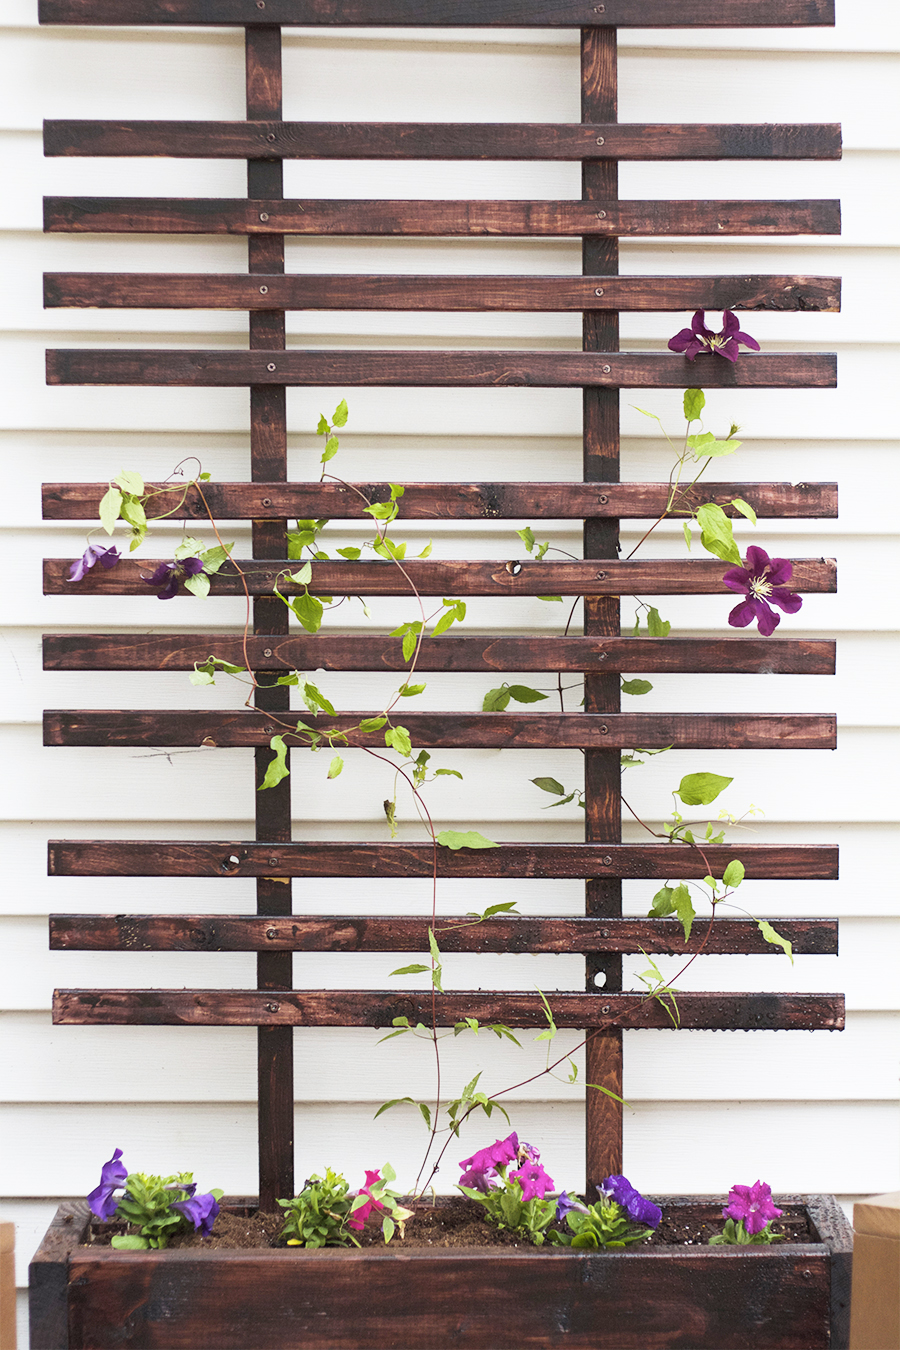
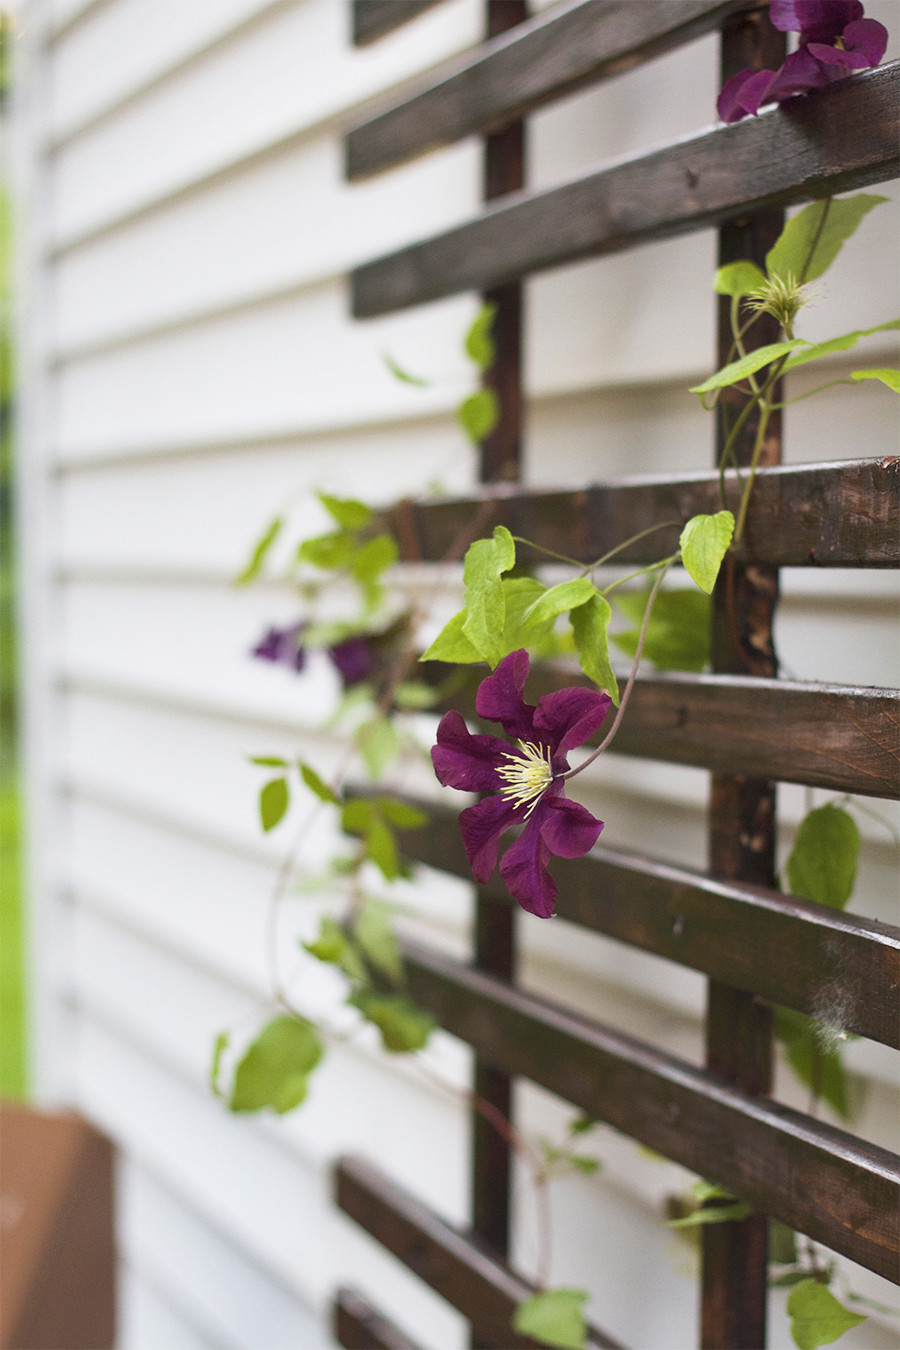
I planted a Clematis, but am not sure how it will do over the summer or the winter. If it doesn’t make it I’ll try an annual seed next time. I’m also going to make another one of these flower boxes so I have two flanking the white wall of the play zone.
The Budget & Source List
▽ 2 – 2″ x 8″ x 10′ Douglas Fir Boards – $11.52
▽ 6 – 1″ x 2″ x 8′ Poplar Strips – $4.66
▽ 1 -2″ x 2″ x 8′ Poplar Strip – $1.42
▽ 1 Box 1-1/4″ Screws – $7.98
▽ 1 Box 2-1/4″ Screws – $6.99
▽ A set of 4 Rubber Casters – $9.96
▽ Stain – $6.99
Total = $49.52
How do I enter?
The cool folks at BLACK+DECKER want you to have one too! All you have to do is visit the BLACK+DECKER site. Leave a comment (by Wednesday, June 25 – 5pm CST), telling me your favorite feature of the AutoSense Drill and how that feature would help you tackle your next project and make your drilling life easier! I’ll randomly choose one of you, and then blamo, you’ll have a cool new drill.
The giveaway is now closed. Congratulations to Marlys who says that having this drill will save her a lot of swearing. Swearing is always fun though, right?
 |
This Post Has Been Sponsored By BLACK+DECKER |




We would love to own a cordless drill – we recently assembled a used swing set in our yard and borrowed my dad’s drill. The drive feature was awesome – would love to have one of our own!
My husband and I just bought our first house and it seems our list of “must have’s/can’t live without” keeps getting longer and longer, but a drill is at the top of our list. My first project is to paint our kitchen cabinets so I have lots of hardware that needs to get removed. I have small hands so I think the compact size would be something I would look for.
Power indicator! FINALLY! I gave up on cordless drills years ago because a) they never seemed to have enough power and most importantly b) they always unexpectedly ran out of battery mid-project. That drove me insane more than anything else. Well, time and improved battery technology has taken care of a), and it looks like B&D has finally fixed b). Hooray!!!
I am getting into gardening and some upholstering so the cordless and compact features would be a great help.
Thank you!
My husband and I are in the process of buying our first home. I would love a fancy drill for all of the projects I have planned for our new place. I am the handier of the two of us, but I still have a lot of room for improvement. I would love to have a drill that intuitively knows when to stop screws flush with the work surface, since I sometimes let my mind wander during projects.
We’ve been in the market for a good cordless drill for a loooong time! I like that this one is compact – our place is small and east storage is super important. Can’t beat a long battery life, either.
“understands when to stop screws flush with the work surface..” Oh the wood-filler I could save in the future (not to mention time sanding!) Great DIY, project!! P.S. You should consider trying out an annual seed on your trellis this year anyways. I usually combine a late bloomer like Ruby Hyacinth or White Black Eyed Susan Vine with my clematis to start giving color after my clematis blooms fall away. Both grow great from seed, directly sown, and provide extra color to get my vine into the late summer/fall months.
Love the planter and LOVE those Adirondack chairs! Are they Loll? The drill… finally, an LED work light. Brilliant!
I love this!! This is such a great project – one that I’ve never ever seen before! I’m getting pretty fed up with DIY/decorating blogs because there’s hardly ever fresh content – but I can always count on you to deliver! THANKS!!
I like the easy switch button and the battery indicator. Both things that would be really helpful!
The battery indicator would save me a lot of swearing! I’d use this to help us build our deck this summer!
Love the trellis planter project! Love how you grouped the trellis into sets of three.
I would love a cordless drill that doesn’t strip screws. I got my corded drill for my first anniversary present in 98. It has seen me through some fun projects. :)
I like that this drill changed easily between drill and drive modes and I think this will make adding onto our deck easier and quicker.
We have such a hard time with our 12V drill and usually end up stripping the screw, even when we put in pilot holes first because we didn’t learn about the torquing aspect of the drill until a week ago. I am intrigued by the ‘autosensing’ function of this drill. Our next project is fixing our planter box that we did last summer. We would love to try it out!!
I would love to have a cordless Black and Decker drill to help us with projects around the house and garden. The auto sense feature sounds awesome, especially to avoid stripping screws. I’ve got my hands full of summer projects where the drill would be so helpful, mainly putting together nursery furniture! Thanks!
Favorite feature – its dwarf size. Coolest feature – AutoSense, yo. My next DIY project is a bed frame and headboard. This BLACK+DECKER drill would make it so pie in the sky!
What DON’T I need a drill for these days? Installing curtain rods, hanging some shelves, and fixing up our closets- a nice foolproof drill would help me get some of these things off my to do list once and for all.
ELECTRONIC CLUTCH. I am the queen of stripping (screws)!! I am currently working on replacing all of the old mid century (cool, yes, but just not working with the other updates) hardware on my kitchen cabinets. After jumping on the ‘BRASS EVERYTHING’ bandwagon and searching long and hard on the information super-highway, I found some awesome brass cabinet pulls for the drawers and simple brass handles for all of the doors. They arrived and they were perfect! And then I realized that my super cool vintage chrome handles were so out of date and just a tad smaller than all current hardware, that any new hardware would require patching one of the existing holes and drilling a new one on every. freaking. cabinet -_- A super awesome new drill would be the bomb! Thanks for a chance to win this awesome giveaway!
I am working on reinforcing my old wooden outdoor table set to buy us a few extra years. I love the technology that senses when a screw is set. Neat-o!
I love that with the technology it doesn’t strip screws- I have stripped numerous screws.
The LED light is a great idea and so is the driving mode. Why has no one else thought of this?
I love the power indicator feature… that would be handy, so that you aren’t in the middle of something and it dies on you.
I would love to have a drill ! Running up and down the street to the neighbors to keep borrowing one is getting a little ridiculous. This drill will also prevent me from stripping screws and I have about 20 cabinet doors I need to rehang once I’m done painting. Your project turned out FANTASTIC!
You’re telling me the sensor will keep us from stripping screws! Yes please! It’s my hubby’s biggest downfall whenever we do projects.
I’m about to tackle making and installing shelves throughout a room. Those brackets get in the way of visibility like whoa and it would be great to own a drill that can stop on it’s own (without me basically doing gymnastics to get at the right angle to see!).
Another for the electronic sensor to keep me from stripping my old hardware. I’ve been trying to use a manual screwdriver to put all my hardware back in and cursing the whole time. I’m about ready to pony up for a drill just to get doors hung back properly and pulls put back on my drawers.
Neeeeeeeeed to know where those chairs are from? Were they a DIY special? I have about three drills laying around the house, just came for those glorious CHAIRS! Please make my backyard dream a reality and share where they were sourced. I’d paint those bad boys charcoal gray and add some stylish mandala print cushions in the worst (best) way!
I love that it automatically stops when your screw is flush with the wood. I can’t tell you how many times I’ve split or cracked my project because I just didn’t know when to stop. this would definitely when I’m building my backyard benches this summer!
I’ve heard the new lithium batteries are stronger and last longer. Our drill you have to constantly recharge it. Never seem to finish a project quickly because of that. And how cool is that, that the B&D drill stops when the screw is flush with the wood….would save a lot of split boards. You are becoming a very good gardener, Scoops. Love seeing all your projects.
A POWER INDICATOR!?!?!? All too often we go to start a project only to realize someone (cough, cough) assumed the battery was charged: dun dun dun.
I have an IKEA kitchen to assemble that has a bazillion screws and we know how finicky those are. A drill that knows when to stop would be amazing.
I absolutely LOVE this! My fiancee and I are house-hunting for our first home, so a new drill will definitely help with the projects I have planned for wherever we end up! I love the fact that the drill will stop when the screw is flush with the wood. Genius!
Hey! This is the coolest give away! We are going to tackle a deck this summer and currently we have a 17 yr old corded drill that we got with our first house. I love that we would not be tripping over a cord and have such power at our fingertips, not to mention the sensor drive!! What a great surprise if I pulled this puppy out when getting started on the deck! Anyway, love that you are drinking out of a pint size wide mouth mason jar….me too!
I’ve stripped way too many screws! I love the electronic clutch! We’re building a new front porch this summer and a new drill would be so incredibly helpful!
Oh man. We have a window to door conversion, plus large entertaining deck on the horizon and a new drill would make both of these projects a million times more bearable. I inherited my electrician step-father’s retired 20lb drill about a decade ago. I’m a petite lady with hands that stopped growing in the fourth grade and using that monster is a task in and of itself. I have to start bench-pressing and curling months beforehand to build up upper body strength. It’s so cumbersome that I – and I am a little embarrassed to admit this – have used mallets, crowbars, butter knives and various blunt objects to drive nails into wood 9and remove them) because the thought of contorting myself into a position that I can comfortably handle my drill is too much to bare. Needless to say, I have many question home improvement projects around the house and a longer list of things that needs to get done. Such is life!
I really need to proof-read my responses. Yeesh!
I’m a newbie when it comes to DIY projects that require power tools. To be honest, I get a little intimidated. After checking out this drill, I realized that it doesn’t seem so hard to use! I like that it’s compact and the trigger switch is a neat feature. I would love to use this drill to build a wood paneled backdrop to go behind my desk. :)
I’m new to home improvements, we just moved into a house from a very small apartment. So anything that can make projects more fool proof is a plus to me!
Oh jeez – is this contest open to Canadian readers? I sure hope so! I borrowed my dad’s drill and driver for the last few months, but he has recently taken both of them back. I’m so in need of my own! I was actually looking at a Black & Decker model, but I haven’t yet made the purchase. I am quite tired of manual screwdrivers (although they are giving me an arm workout!). The drill/driver combo seems like it’ll simplify tasks and it’ll take up less space than 2 separate tools in my storage room. Bonus.
I am making wooden signs to stake into the ground for my upcoming wedding and I’m notorious for stripping screws. This drill is the answer!
Not having to change out the bits would be an amazing time saving feature. Also, having stripped a few screws in my time the intelligent technology would be much appreciated!
That drill looks awesome! Ours is like a hundred years old. I love how compact this one is, and that it has an awesome battery life.
We’re building shelves and cupboards into a guestroom/office. This drill looks fantastic–I love the potential of fewer stripped screws!
I love the power indicator light. We currently have a drill with two rechargable batteries…and I STILL feel like neither of them is charged when we need it!
My favorite is the Battery Status Indication. I have cordless weed trimmers and the only way you know the battery is done is it STOPS.
I love that it is so compact! My husband’s drill stays in the garage because there is no place to store it. I feel like this is a drill you can have around the house, ready to use for all projects!
I have a really crappy cordless drill that doesn’t hold a charge. I’d love to get a nice new one that has a much better battery life. The battery life indicator would be a huge bonus!
We are just starting to get into DIY and a great drill would be perfect!
Actually, I like the small size of it. My hammer drill now is so heavy!
Thanks for the chance,
mary
I love the battery status indicator on this. this would make my life easier because it doesnt strip screws like my old one did. I would love to build shelves with this.
Great giveaway! I would love to build something, even a simple frame for a vintage painting would be a good beginner project. Thanks!
“electronic clutch that automatically stops when a screw is in place” – !!! – this compact little gem would be a great help – size wise and distraction proof! pick me, pick me!
I like the Drill / Drive Mode and the battery indicator. (I swear every time we go to grab our drill the batter is low!) Definitely would come in handy with renovating projects!
I never have luck with any clematis except for Autumn Clematis.(I don’t care for the ubiquitous dark purple ones you see everywhere). The only downside is that there are no blooms throughout summer, but the payoff in the fall is worth it! Every fall, mine looks as good as this pic, with no effort:
http://www.whiteflowerfarm.com/cgi-bin/track/61993682+26630-product.html?gclid=CJbZreTalb8CFdNzMgodY3QAUQ
hey there,
this is beautiful so…i thought i would build it this afternoon according to your instructions. I made a shopping list from your “budget and source” list, got home and set to work. uh oh. not enough wood! i just want to point out that the source list calls for 2- 2x8x8 pieces of douglas fir for a total of 192″ of wood. The cut pieces list{which I looked at later} calls for 5-2x8x32 pieces and 4-2x8x10.25 pieces for a total of 201″. just wanted to save someone a headache and second trip to the hardware store. i know you already gave that drill away…but have I earned it, or what? i actually made this thang:)
Hey Tea, So sorry for the discrepancy in the lists. I’ll go ahead an change that right now. Hope you enjoy your planter box, what are you going to grown on the trellis?
haha…definitely not a problem! i would have just made them shorter if i hadn’t started making all the other cuts first:) mise en place, tea!! i said “they”…because i actually made 2:) sadly, next door turned into a rental last year. being introverts, my husband and i needed some quick privacy on our deck as we save to build a proper fence. so, clematis it is! they grow quickly and well here in Illinois and will give me a nice living wall to distract me from the obvious abandon of care next door. also, i’m gonna throw in little creeping phlox at the 2 edges to kind of “weep” down the sides. staining today if it ever stops raining…then pictures:) thanks so much for sharing, Allison. You have stellar taste!
I’m in the middle of building this & have noticed a problem. The measurements for your trellis uprights are too short. You give it as 64″. If you break down the cross piece measurements from the top you have 2″ + 10″ (the first 3 crosspiece group) + 3.75″ + 14″ (the first 4 crosspiece group) + 3.75″ + 14″ (the second 4 crosspiece group) + 3.75″ + 10″ (the second crosspiece group). This come to 61.25″. this does not leave anything like the length of timber you have shown to be attached to the box. Where is the discrepancy? I can only assume thet your 2″x1″ is a bit skinny.
I’ve back worked it to fit at a cross member width of 1.75″ which means that he thickness should be about 0.75″. It looks like your USA’ian measurements are 22mmx 46mm – ish..
It’s a nice design and for a first time woodworker, an interesting challenge. The problem is that the wife saw the design & read the measurements in centimeters Half built, it’s enormous!!
I appreciate the 11 position clutch that will help prevent stripping screws or damaging material. I would use the drill to make a wood toy or storage box for the kid’s play things that are all over the patio. Thanks for the chance :)
jslbrown2009 at aol dot com
What a beautiful fence in the background! Did you build it yourselves and if you don’t mind what size boards are they and what type of wood? Looking to have a similar one built. Thanks.
As a more “experienced “ ( read older) person, a cordless drill would be safer for me…can’t trip over the cord.
In addition, with arthritic hands, having a drill for screw-in projects would be of great benefit.
I know this is an old entry, but could you share the name of the song you added in the vimeo video?
Great idea, loved it when I saw it pop up and directed me to your site but I have to say I can not believe Black and Decker sponsors you. The poor quality of work and attention to even the simplest of things is embarrassing but it made sense when your pictures showed the young lad working on the project. Seeing that made it all make sense. The idea is fantastic but definitely needs tweeking and more attention to the work and presentation.
Hi,
How did that clematis do?